Introduction to Chicken Chimichangas
As a busy mom, I know how precious time can be, especially when it comes to dinner. That’s why I absolutely love making Chicken Chimichangas! These crispy, flavor-packed delights are not only quick to whip up, but they also bring a smile to everyone’s face. Imagine biting into a golden, crunchy shell filled with tender chicken, creamy cheese, and savory beans. It’s a dish that impresses your loved ones while being a simple solution for those hectic weeknights. Trust me, once you try this recipe, it will become a staple in your kitchen!
Why You’ll Love This Chicken Chimichangas
These Chicken Chimichangas are a lifesaver for busy evenings! They come together in just 25 minutes, making them perfect for those nights when time is tight. The combination of crispy tortillas and a savory filling is simply irresistible. Plus, they’re versatile! You can customize them to suit your family’s tastes, ensuring everyone leaves the table happy. Trust me, once you serve these, they’ll be a family favorite!
Ingredients for Chicken Chimichangas
Gathering the right ingredients is key to making delicious Chicken Chimichangas. Here’s what you’ll need:
- Cooked chicken: Shredded chicken is the star of the show. You can use rotisserie chicken for convenience or cook your own.
- Refried beans: These add creaminess and a hearty texture. You can use canned or homemade, depending on your preference.
- Shredded cheddar cheese: This cheese brings a sharp flavor that pairs beautifully with the other ingredients.
- Shredded Monterey Jack cheese: Known for its meltiness, this cheese adds a lovely creaminess to the filling.
- Taco seasoning: A blend of spices that elevates the flavor of the chicken. You can use store-bought or make your own for a personal touch.
- Flour tortillas: Large tortillas are essential for wrapping up the filling. They provide a soft, chewy base for your chimichangas.
- Olive oil: Used for frying, it gives the chimichangas that golden, crispy exterior we all love.
- Salsa: A fresh, zesty topping that complements the richness of the chimichangas. Choose your favorite variety!
- Sour cream (optional): A dollop of sour cream adds a cool, creamy contrast to the warm chimichangas.
For exact quantities, check the bottom of the article where you can find everything listed for easy printing. Happy cooking!
How to Make Chicken Chimichangas
Now that you have all your ingredients ready, let’s dive into making these crispy, flavor-packed Chicken Chimichangas! Follow these simple steps, and you’ll have a delicious meal on the table in no time.
Step 1: Prepare the Filling
Start by mixing together the shredded chicken, refried beans, taco seasoning, and both types of cheese in a large bowl. This is where the magic happens! The combination of flavors creates a filling that’s rich and satisfying. Make sure everything is well combined, so each bite is bursting with flavor. If you want to spice things up, feel free to add some diced jalapeños or bell peppers for an extra kick!
Step 2: Assemble the Chimichangas
Next, lay out your flour tortillas on a clean surface. Spoon an even amount of the chicken mixture into the center of each tortilla. Now comes the fun part! Roll the tortillas tightly, folding in the sides as you go to create a sealed chimichanga. This step is crucial for keeping all that delicious filling inside while frying. Don’t worry if they’re not perfect; they’ll still taste amazing!
Step 3: Fry the Chimichangas
Heat a generous amount of olive oil in a large skillet over medium heat. Once the oil is hot, carefully place the chimichangas seam-side down in the skillet. Fry them for about 3-4 minutes on each side, or until they turn golden brown and crispy. The sizzling sound is music to my ears! Make sure to keep an eye on them, as they can brown quickly. You want that perfect crunch!
Step 4: Serve and Enjoy
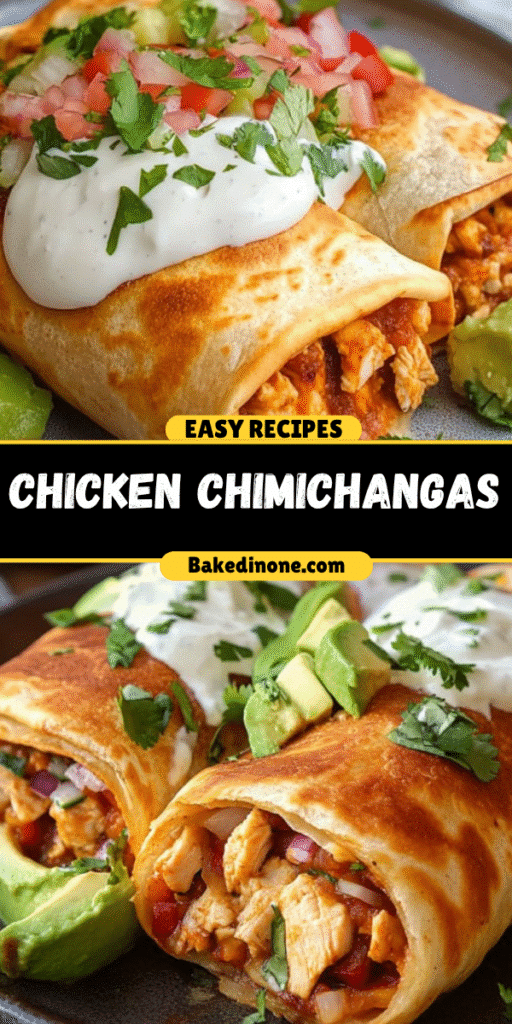
Once they’re beautifully golden, remove the chimichangas from the skillet and let them drain on paper towels. This helps get rid of any excess oil. Serve them hot with a side of salsa and a dollop of sour cream if you like. The contrast of the warm, crispy chimichangas with the cool toppings is simply delightful. Enjoy every bite of this delicious meal!
Tips for Success
- Use rotisserie chicken for a quick and easy filling.
- Don’t overcrowd the skillet; fry in batches for even cooking.
- For extra crunch, let the chimichangas rest on paper towels after frying.
- Experiment with different cheeses for unique flavors.
- Make a double batch and freeze some for busy nights!
Equipment Needed
- Large skillet: A non-stick skillet works best, but any heavy-bottomed pan will do.
- Mixing bowl: Use a large bowl for combining the filling; a glass or ceramic bowl is ideal.
- Spatula: A sturdy spatula helps flip the chimichangas with ease.
- Paper towels: Essential for draining excess oil after frying.
Variations
- Vegetarian Option: Substitute the chicken with sautéed mushrooms, zucchini, or a mix of your favorite vegetables for a delicious meatless version.
- Spicy Chimichangas: Add diced jalapeños or a splash of hot sauce to the filling for an extra kick that spice lovers will adore.
- Cheesy Delight: Increase the amount of cheese or mix in some pepper jack for a creamy, spicy twist.
- Healthier Baked Version: Instead of frying, brush the chimichangas with olive oil and bake them at 400°F for about 20 minutes until crispy.
- Gluten-Free Option: Use gluten-free tortillas to make these chimichangas suitable for those with gluten sensitivities.
Serving Suggestions
- Pair your Chicken Chimichangas with a fresh garden salad for a light and refreshing contrast.
- Serve with a side of Mexican rice or cilantro-lime quinoa for a hearty meal.
- Complement with a chilled margarita or a refreshing iced tea for a delightful drink.
- Garnish with fresh cilantro and lime wedges for a pop of color and flavor.
FAQs about Chicken Chimichangas
As you embark on your culinary adventure with Chicken Chimichangas, you might have a few questions. Here are some common queries that can help you along the way!
Can I make Chicken Chimichangas ahead of time?
Absolutely! You can prepare the filling and assemble the chimichangas in advance. Just store them in the fridge until you’re ready to fry. This makes for a quick dinner solution on busy nights!
What can I serve with Chicken Chimichangas?
These crispy, flavor-packed Chicken Chimichangas pair wonderfully with salsa, guacamole, or a fresh salad. You can also serve them with Mexican rice or refried beans for a complete meal.
Can I bake Chicken Chimichangas instead of frying?
Yes! For a healthier option, brush the chimichangas with olive oil and bake them at 400°F for about 20 minutes. They’ll still be crispy and delicious!
How do I store leftover Chicken Chimichangas?
Store any leftovers in an airtight container in the fridge for up to three days. Reheat them in the oven for the best texture, or use the microwave if you’re in a hurry.
Can I customize the filling for my Chicken Chimichangas?
Definitely! Feel free to add your favorite ingredients like black beans, corn, or different cheeses. The beauty of these chimichangas is their versatility!
Final Thoughts
Making Chicken Chimichangas is more than just cooking; it’s about creating joyful moments around the dinner table. The crispy, golden exterior gives way to a warm, flavorful filling that brings smiles to my family’s faces. Whether it’s a busy weeknight or a special gathering, these chimichangas are a delightful treat that never fails to impress. Plus, the versatility of the recipe means I can adapt it to suit everyone’s tastes. So, roll up your sleeves, gather your loved ones, and enjoy the deliciousness that these crispy, flavor-packed Chicken Chimichangas bring to your home!
“`
Print
Chicken Chimichangas: Discover the Ultimate Recipe Today!
- Total Time: 25 minutes
- Yield: 4 servings 1x
- Diet: Gluten Free
Description
Crispy, flavor-packed chicken chimichangas filled with shredded chicken, refried beans, and cheese, served with salsa and optional sour cream.
Ingredients
- 2 cups cooked chicken (shredded)
- 1 cup refried beans
- 1/2 cup shredded cheddar cheese
- 1/2 cup shredded Monterey Jack cheese
- 1 tablespoon taco seasoning
- 4 large flour tortillas
- 1 tablespoon olive oil
- 1/2 cup salsa
- 1/4 cup sour cream (optional)
Instructions
- In a bowl, mix together the shredded chicken, refried beans, taco seasoning, and both types of cheese.
- Lay out the flour tortillas and evenly distribute the chicken mixture in the center of each.
- Roll the tortillas tightly, folding in the sides as you go to form a sealed chimichanga.
- Heat olive oil in a large skillet over medium heat.
- Fry the chimichangas for 3-4 minutes on each side, until golden brown and crispy.
- Remove from the skillet and drain on paper towels.
- Serve hot with salsa and optional sour cream on the side.
Notes
- For extra flavor, consider adding diced jalapeños or bell peppers to the chicken mixture.
- These chimichangas can be baked instead of fried for a healthier option.
- Prep Time: 15 minutes
- Cook Time: 10 minutes
- Category: Main Dish
- Method: Frying
- Cuisine: Mexican
Nutrition
- Serving Size: 1 chimichanga
- Calories: 350
- Sugar: 2g
- Sodium: 600mg
- Fat: 18g
- Saturated Fat: 7g
- Unsaturated Fat: 8g
- Trans Fat: 0g
- Carbohydrates: 30g
- Fiber: 4g
- Protein: 20g
- Cholesterol: 60mg




Leave a Comment