gutenberg
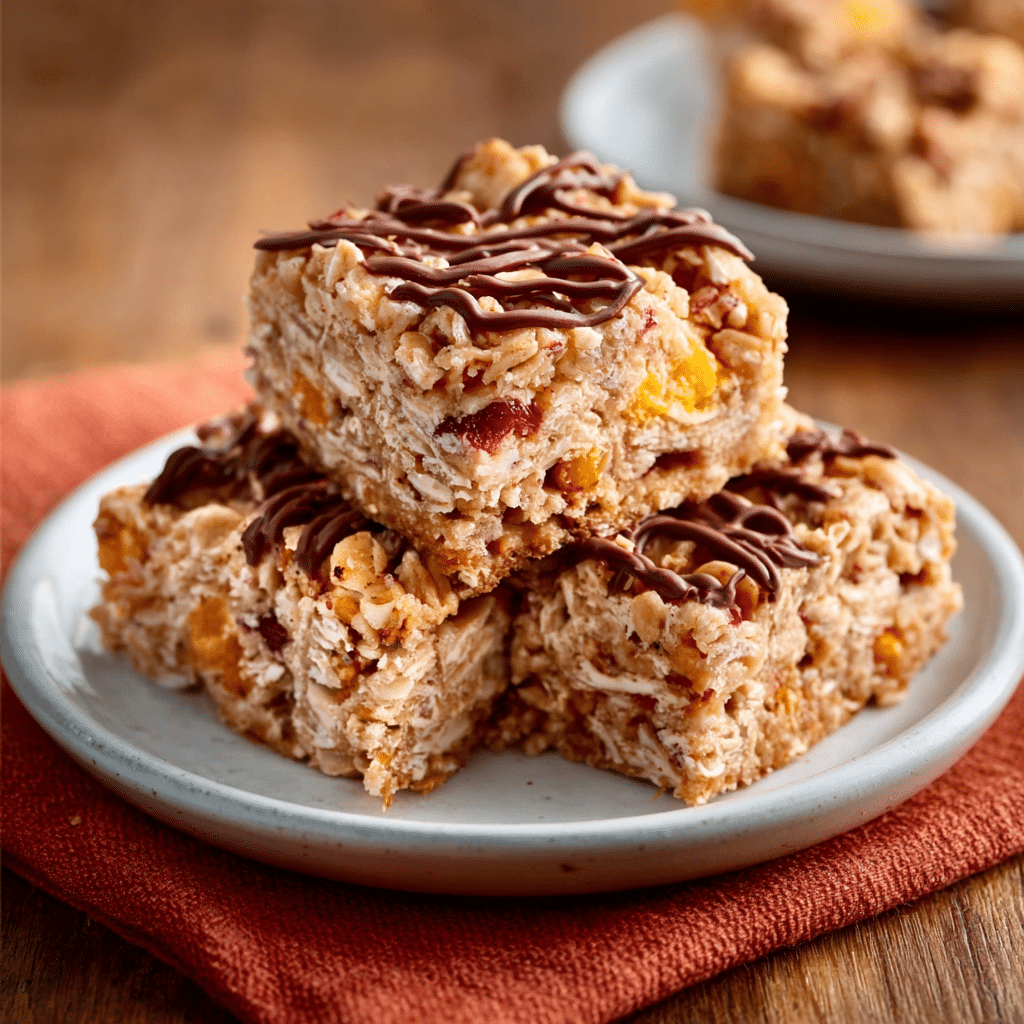
Introduction to Crispy Cinnamon Ribbon Bars
Hey there, fellow home cooks! If you’re anything like me, you know that life can get a bit hectic, especially when juggling family, work, and everything in between. That’s why I’m excited to share my recipe for Crispy Cinnamon Ribbon Bars. These delightful treats are not just a quick solution for a busy day; they’re also a fantastic way to impress your loved ones. With their warm, cinnamon aroma wafting through your kitchen, you’ll have everyone asking for seconds. So, let’s dive into this delicious adventure together!
Why You’ll Love This Crispy Cinnamon Ribbon Bars
Let me tell you, these Crispy Cinnamon Ribbon Bars are a game-changer! They’re incredibly easy to whip up, taking just about 45 minutes from start to finish. Perfect for those busy afternoons when you need a sweet pick-me-up or a last-minute dessert for guests. Plus, the combination of crispy edges and gooey cinnamon filling is simply irresistible. Trust me, once you try them, they’ll become a staple in your kitchen!
Ingredients for Crispy Cinnamon Ribbon Bars
Gathering the right ingredients is half the fun of baking! Here’s what you’ll need to create these delightful Crispy Cinnamon Ribbon Bars. Don’t worry; I’ll keep it simple and straightforward. You can find the exact measurements at the bottom of the article for easy printing.
- All-purpose flour: This is the backbone of your bars, providing structure and a lovely texture. It’s versatile and a staple in most kitchens.
- Baking powder: This little leavening agent helps your bars rise, giving them that perfect fluffy texture. Make sure it’s fresh for the best results!
- Salt: Just a pinch enhances the flavors, balancing the sweetness and bringing out the cinnamon’s warmth.
- Ground cinnamon: The star of the show! This spice adds that cozy, aromatic flavor we all love. Feel free to adjust the amount if you’re a cinnamon enthusiast!
- Unsalted butter: Softened butter is key for a rich, creamy batter. It adds moisture and flavor, making your bars melt in your mouth.
- Granulated sugar: This sweetener gives your bars their delightful sweetness and helps create that crispy top layer.
- Large egg: Eggs bind everything together and add moisture. They’re essential for achieving that perfect texture.
- Vanilla extract: A splash of vanilla elevates the flavor profile, adding a warm, sweet note that complements the cinnamon beautifully.
- Packed brown sugar: This adds a deeper sweetness and a hint of caramel flavor, making the filling extra delicious.
- Chopped walnuts (optional): If you enjoy a bit of crunch, toss in some walnuts! They add texture and a nutty flavor. You can also swap them for pecans or leave them out entirely for a nut-free option.
- Granulated sugar and ground cinnamon (for topping): This simple mixture creates a delightful crispy topping that adds an extra layer of flavor and texture to your bars.
With these ingredients on hand, you’re well on your way to baking up a storm! Remember, the joy of cooking comes from experimenting, so feel free to make substitutions based on what you have in your pantry. Let’s get ready to create some magic in the kitchen!
How to Make Crispy Cinnamon Ribbon Bars
Now that we have our ingredients ready, let’s dive into the fun part—making these Crispy Cinnamon Ribbon Bars! Follow these simple steps, and you’ll have a delicious treat in no time. I promise, it’s easier than it sounds!
Step 1: Preheat and Prepare
First things first, preheat your oven to 350°F (175°C). This step is crucial for even baking, ensuring your bars come out perfectly golden and delicious. While the oven warms up, lightly grease a 9×13-inch baking dish. You can use cooking spray or butter—whatever you have on hand. This will help your bars release easily once they’re baked.
Step 2: Mix Dry Ingredients
In a mixing bowl, combine the all-purpose flour, baking powder, salt, and ground cinnamon. Whisk them together until they’re well blended. This step is important because it creates a balanced flavor throughout your bars. Plus, it helps to evenly distribute the baking powder, ensuring your bars rise beautifully!
Step 3: Cream Butter and Sugar
In another large bowl, beat the softened unsalted butter with the granulated sugar until the mixture is fluffy and pale. This usually takes about 2-3 minutes. The fluffiness is key here; it helps to incorporate air into the batter, giving your bars that light, tender texture. Trust me, this step is worth the extra minute!
Step 4: Combine Wet Ingredients
Next, add in the large egg and vanilla extract to the butter-sugar mixture. Mix thoroughly until everything is well combined. The egg binds the ingredients together, while the vanilla adds a warm, sweet note that complements the cinnamon perfectly. You’ll love the aroma that fills your kitchen at this point!
Step 5: Fold in Dry Ingredients
Now, it’s time to gently fold the dry ingredients into the wet mixture. Use a spatula or wooden spoon to mix until just combined. Be careful not to overmix; a few lumps are perfectly fine! Overmixing can lead to tough bars, and we want them to be soft and chewy.
Step 6: Layer the Batter
Spread half of the batter into the bottom of your prepared baking dish, smoothing it out evenly. This first layer is the foundation for your Crispy Cinnamon Ribbon Bars. Make sure it’s nice and even, as this will help with the layering technique that adds optimal flavor!
Step 7: Prepare the Cinnamon Filling
In a separate bowl, mix together the packed brown sugar, chopped walnuts (if you’re using them), and ground cinnamon. This mixture is the delightful surprise that will make your bars extra special. Sprinkle it evenly over the first layer of batter, ensuring every bite has that sweet, cinnamon goodness.
Step 8: Add the Final Batter Layer
Carefully spoon the remaining batter over the cinnamon filling. Spread it evenly without disturbing the filling underneath. This step is crucial because it keeps the delicious filling hidden until you take that first bite. It’s like a little surprise waiting to be discovered!
Step 9: Sprinkle Topping
In a small bowl, mix the tablespoon of granulated sugar with the teaspoon of ground cinnamon for the topping. Sprinkle this mixture over the entire surface of the batter. This will enhance the crispy texture and add a lovely sweetness to the top of your bars. Who doesn’t love a little extra crunch?
Step 10: Bake to Perfection
Now, pop your baking dish into the preheated oven and bake for 25-30 minutes. Keep an eye on them! You’ll know they’re done when the edges are golden brown and a toothpick inserted in the center comes out clean. The smell wafting through your kitchen will be absolutely heavenly!
Step 11: Cool and Slice
Once baked, let the bars cool in the pan for about 10 minutes before slicing them into squares. This cooling time is crucial for achieving the best texture. If you slice them too soon, they might fall apart. Patience is key here, my friends! Once they’re cool, enjoy the fruits of your labor!
Tips for Success
- Always use room temperature ingredients, especially butter and eggs, for a smoother batter.
- Don’t skip the cooling step; it helps the bars set properly and makes slicing easier.
- For a fun twist, try adding a teaspoon of nutmeg to the batter for extra warmth.
- Keep an eye on the baking time; ovens can vary, so check for doneness a few minutes early.
- Store leftovers in an airtight container to keep them fresh and crispy!
Equipment Needed
- 9×13-inch baking dish: A standard size for this recipe; you can use a glass or metal dish.
- Mixing bowls: A couple of medium-sized bowls will do the trick.
- Whisk: For mixing dry ingredients; a fork works in a pinch!
- Spatula or wooden spoon: Essential for folding and spreading the batter.
- Measuring cups and spoons: Accurate measurements are key for baking success!
Variations
- Nut-Free Option: Leave out the walnuts or substitute with sunflower seeds for a nut-free treat that still has a delightful crunch.
- Gluten-Free Version: Swap the all-purpose flour for a gluten-free flour blend. Just make sure it contains xanthan gum for the best texture!
- Spiced Up: Add a teaspoon of nutmeg or ginger to the batter for an extra layer of warmth and spice that pairs beautifully with cinnamon.
- Fruity Twist: Mix in some dried cranberries or raisins into the batter for a fruity surprise that adds a pop of flavor.
- Chocolate Lovers: Fold in some mini chocolate chips for a decadent twist that will satisfy any sweet tooth!
Serving Suggestions
- Pair your Crispy Cinnamon Ribbon Bars with a scoop of vanilla ice cream for a delightful dessert experience.
- Serve with a hot cup of coffee or tea to complement the warm cinnamon flavors.
- For a festive touch, dust with powdered sugar before serving.
- Cut into smaller squares for a perfect bite-sized treat at gatherings.
FAQs about Crispy Cinnamon Ribbon Bars
Got questions about these delightful Crispy Cinnamon Ribbon Bars? You’re not alone! Here are some common queries I’ve encountered, along with my answers to help you bake with confidence.
1. Can I make these bars ahead of time?
Absolutely! These bars store well. You can bake them a day in advance and keep them in an airtight container at room temperature. Just make sure they’re completely cooled before storing to maintain that crispy texture!
2. How do I know when the bars are done baking?
Great question! You’ll know your Crispy Cinnamon Ribbon Bars are ready when the edges are golden brown and a toothpick inserted in the center comes out clean. If it has a few moist crumbs, that’s okay; it means they’ll be nice and chewy!
3. Can I freeze these bars for later?
Yes, you can! Once cooled, wrap the bars tightly in plastic wrap and then in aluminum foil. They’ll keep in the freezer for up to three months. When you’re ready to enjoy them, just thaw at room temperature or pop them in the microwave for a few seconds!
4. What can I substitute for walnuts in the recipe?
If you’re not a fan of walnuts or have allergies, you can easily substitute them with pecans, sunflower seeds, or simply leave them out altogether. The Crispy Cinnamon Ribbon Bars will still be delicious without them!
5. How can I make these bars more festive for the holidays?
To add a festive touch, consider drizzling a simple icing made from powdered sugar and milk over the cooled bars. You can also sprinkle some colorful holiday sprinkles on top for a cheerful presentation. These little touches will make your bars a hit at any holiday gathering!
Final Thoughts
Making Crispy Cinnamon Ribbon Bars is more than just baking; it’s about creating moments of joy in your kitchen. The delightful aroma of cinnamon fills the air, wrapping your home in warmth and comfort. Whether you’re sharing them with family or enjoying a quiet moment with a cup of tea, these bars bring a smile to everyone’s face. Plus, they’re so easy to whip up, even on the busiest days! So, roll up your sleeves, gather your ingredients, and let the magic happen. Trust me, you’ll be glad you did!
“`
Print
Crispy Cinnamon Ribbon Bars: Unleash the Flavor Today!
- Total Time: 45 minutes
- Yield: 12 bars 1x
- Diet: Vegetarian
Description
Deliciously crispy and flavorful cinnamon ribbon bars that are perfect for any occasion.
Ingredients
- 2 cups all-purpose flour
- 1 teaspoon baking powder
- 1/2 teaspoon salt
- 1 teaspoon ground cinnamon
- 1/2 cup unsalted butter, softened
- 1 cup granulated sugar
- 1 large egg
- 1 teaspoon vanilla extract
- 1/2 cup packed brown sugar
- 1/4 cup chopped walnuts (optional)
- 1 tablespoon granulated sugar (for topping)
- 1 teaspoon ground cinnamon (for topping)
Instructions
- Preheat your oven to 350°F (175°C) and lightly grease a 9×13-inch baking dish.
- In a mixing bowl, combine the flour, baking powder, salt, and cinnamon, whisking until well blended.
- In another large bowl, beat the softened butter with the granulated sugar until fluffy and pale. Incorporate the egg and vanilla extract, mixing thoroughly.
- Slowly fold the dry ingredients into the wet mixture, stirring gently until just combined.
- Spread half of the batter into the bottom of the prepared baking dish, smoothing it out evenly.
- In a separate bowl, combine the brown sugar, walnuts (if using), and cinnamon, then sprinkle this mixture over the first layer of batter.
- Carefully spoon the remaining batter over the brown sugar layer, spreading it evenly without disturbing the filling.
- Mix the tablespoon of granulated sugar with the teaspoon of cinnamon and sprinkle this topping over the entire surface of the batter.
- Bake in the preheated oven for 25-30 minutes, or until the edges are golden brown and a toothpick inserted in the center comes out clean.
- Let the bars cool in the pan for about 10 minutes before slicing into squares.
Notes
- For an added twist, mix in a teaspoon of nutmeg into the batter.
- You can replace walnuts with pecans or leave them out for a nut-free option.
- For extra indulgence, drizzle a simple icing made from powdered sugar and milk over the cooled bars.
- Prep Time: 15 minutes
- Cook Time: 30 minutes
- Category: Dessert
- Method: Baking
- Cuisine: American
Nutrition
- Serving Size: 1 bar
- Calories: 200
- Sugar: 15g
- Sodium: 150mg
- Fat: 8g
- Saturated Fat: 5g
- Unsaturated Fat: 3g
- Trans Fat: 0g
- Carbohydrates: 30g
- Fiber: 1g
- Protein: 2g
- Cholesterol: 30mg


Leave a Comment