Introduction to Creamy Biscoff Cheesecake
As a busy mom, I know how precious time can be, especially when it comes to whipping up something special for my family. That’s why I’m excited to share my Creamy Biscoff Cheesecake recipe with you! This delightful dessert is not only a quick solution for a hectic day, but it also impresses everyone at the table. Imagine a rich, creamy cheesecake infused with the irresistible flavor of Biscoff cookies and spread. It’s a treat that brings smiles and satisfaction, making it perfect for any occasion, from casual weeknight dinners to festive gatherings.
Why You’ll Love This Creamy Biscoff Cheesecake
This Creamy Biscoff Cheesecake is a dream come true for busy moms and professionals alike. It’s a no-bake dessert, which means you can whip it up in no time without turning on the oven. The combination of creamy cheesecake and the unique flavor of Biscoff cookies creates a taste sensation that’s hard to resist. Plus, it’s a crowd-pleaser, making it perfect for family gatherings or a sweet treat after a long day.
Ingredients for Creamy Biscoff Cheesecake
Gathering the right ingredients is the first step to creating this delightful Creamy Biscoff Cheesecake. Here’s what you’ll need:
- Biscoff cookies: These are the star of the show! Their unique caramel flavor adds a delicious crunch to the crust.
- Melted butter: This binds the crushed cookies together, creating a rich and flavorful base for your cheesecake.
- Cream cheese: The creamy foundation of the cheesecake, it provides that luscious texture we all love.
- Biscoff spread: Also known as cookie butter, this adds an extra layer of Biscoff flavor to the filling. It’s pure bliss!
- Powdered sugar: This sweetens the cheesecake without adding any graininess, ensuring a smooth finish.
- Vanilla extract: A splash of vanilla enhances the overall flavor, making it even more irresistible.
- Heavy whipping cream: Whipping this until stiff peaks form gives the cheesecake its light and airy texture.
- Melted Biscoff spread (optional): Drizzling this on top adds a beautiful finish and extra flavor.
- Crushed Biscoff cookies for garnish (optional): These make for a lovely presentation and a little extra crunch.
For exact measurements, you can find them at the bottom of the article, ready for printing. Happy baking!
How to Make Creamy Biscoff Cheesecake

Now that you have all your ingredients ready, let’s dive into the fun part—making this Creamy Biscoff Cheesecake! Follow these simple steps, and you’ll have a dessert that’s sure to impress.
Step 1: Prepare the Crust
Start by mixing the crushed Biscoff cookies with melted butter in a bowl. The buttery goodness will help bind the cookies together, creating a delicious crust.
Once combined, press this mixture firmly into the bottom of a springform pan. Make sure it’s even and compact. Then, pop it in the refrigerator while you prepare the filling. This chilling time helps the crust set nicely.
Step 2: Make the Filling
In a large mixing bowl, beat the softened cream cheese until it’s smooth and creamy. This is where the magic begins!
Next, add the Biscoff spread, powdered sugar, and vanilla extract. Mix everything together until fully combined. The aroma will be heavenly, and you might find yourself sneaking a taste!
Step 3: Whip the Cream
In a separate bowl, whip the cold heavy cream until stiff peaks form. This step is crucial for achieving that light and airy texture in your cheesecake.
Once whipped, gently fold the whipped cream into the Biscoff mixture. Be careful not to deflate the cream; you want to keep that fluffiness intact!
Step 4: Assemble the Cheesecake
Now it’s time to pour the creamy filling over your chilled crust. Use a spatula to smooth the top, making it look as pretty as it tastes.
Cover the cheesecake with plastic wrap and refrigerate for at least 6 hours, or overnight if you can wait. This allows it to set properly, ensuring every slice holds its shape.
Step 5: Add the Topping
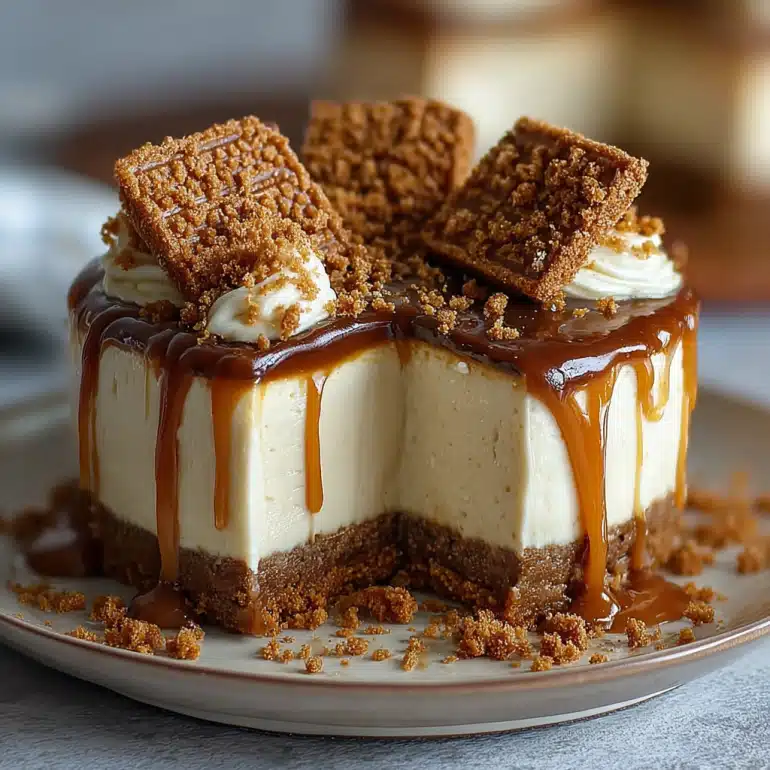
Once your cheesecake is set, it’s time for the finishing touch! Drizzle the melted Biscoff spread over the top. This adds a beautiful sheen and extra flavor.
For a little crunch, sprinkle some crushed Biscoff cookies on top. Chill again for 15–20 minutes to let everything meld together.
Step 6: Serve and Enjoy
Finally, slice your Creamy Biscoff Cheesecake and serve it up! Each bite is a delightful mix of creamy, crunchy, and sweet flavors that will have everyone coming back for more.
Enjoy this rich, no-bake cheesecake with the irresistible taste of cookie butter. It’s a dessert that’s sure to become a favorite!
Tips for Success
- Use cold heavy cream for whipping; it helps achieve those perfect stiff peaks.
- For a firmer texture, let the cheesecake set overnight in the fridge.
- Feel free to adjust the amount of Biscoff spread to suit your taste.
- Make sure to press the crust firmly for a sturdy base.
- Don’t skip the chilling time; it’s essential for the cheesecake to hold its shape.
Equipment Needed
- Springform pan: Ideal for easy removal of the cheesecake. A regular pie dish works too, but slicing may be trickier.
- Mixing bowls: Use at least two—one for the filling and one for whipping cream.
- Electric mixer: A hand mixer or stand mixer makes beating the cream cheese a breeze.
- Spatula: Perfect for folding in the whipped cream and smoothing the filling.
Variations of Creamy Biscoff Cheesecake
- Chocolate Biscoff Cheesecake: Add melted chocolate to the filling for a rich, chocolatey twist that pairs beautifully with the Biscoff flavor.
- Nutty Biscoff Cheesecake: Incorporate crushed nuts like pecans or walnuts into the crust for added texture and flavor.
- Vegan Biscoff Cheesecake: Substitute cream cheese with a vegan alternative and use coconut cream instead of heavy cream for a dairy-free version.
- Fruit-Infused Biscoff Cheesecake: Top the cheesecake with fresh berries or a fruit compote for a refreshing contrast to the creamy filling.
- Spiced Biscoff Cheesecake: Add a pinch of cinnamon or nutmeg to the filling for a warm, spiced flavor that enhances the Biscoff cookies.
Serving Suggestions for Creamy Biscoff Cheesecake
- Fresh Berries: Serve with a side of strawberries or raspberries for a pop of color and tartness.
- Whipped Cream: A dollop of freshly whipped cream on top adds a light touch.
- Hot Coffee: Pair with a warm cup of coffee or espresso to balance the sweetness.
- Chocolate Drizzle: A drizzle of chocolate sauce can elevate the presentation.
- Elegant Plating: Use a cake stand for a beautiful display at gatherings.
FAQs about Creamy Biscoff Cheesecake
Can I make this Creamy Biscoff Cheesecake ahead of time?
Absolutely! This no-bake cheesecake is perfect for making ahead. Just prepare it the day before and let it set overnight in the fridge. It’ll be ready to impress your guests the next day!
How long does the Creamy Biscoff Cheesecake last in the fridge?
Stored properly in an airtight container, this cheesecake can last up to 5 days in the fridge. Just be sure to keep it covered to maintain its freshness.
Can I use a different type of cookie for the crust?
Yes! While Biscoff cookies are the star here, you can substitute them with graham crackers or Oreos for a different flavor profile. Just adjust the butter accordingly to bind the crust.
Is this Creamy Biscoff Cheesecake suitable for vegetarians?
Yes, this cheesecake is vegetarian-friendly! It contains no meat or fish products, making it a delightful dessert for everyone to enjoy.
Can I freeze the Creamy Biscoff Cheesecake?
Yes, you can freeze it! Just wrap it tightly in plastic wrap and then in aluminum foil. It can be frozen for up to 2 months. Thaw it in the fridge before serving for the best texture.
Final Thoughts
Creating this Creamy Biscoff Cheesecake is more than just making a dessert; it’s about bringing joy to your family and friends. Each slice is a delightful experience, combining the rich flavors of Biscoff cookies with a creamy texture that melts in your mouth. Whether it’s a special occasion or a simple weeknight treat, this cheesecake is sure to impress. I love how easy it is to prepare, allowing me to spend more time with my loved ones. So, roll up your sleeves and indulge in this sweet adventure—you won’t regret it!
“`
Print
Creamy Biscoff Cheesecake: Indulge in a Delicious Recipe!
- Total Time: 6 hours 30 minutes
- Yield: 8 servings 1x
- Diet: Vegetarian
Description
A rich and creamy no-bake cheesecake infused with the delicious flavor of Biscoff cookies and spread.
Ingredients
- 2 cups Biscoff cookies, crushed
- 1/2 cup melted butter
- 16 oz (450 g) cream cheese, softened
- 1 cup Biscoff spread (cookie butter)
- 3/4 cup powdered sugar
- 1 teaspoon vanilla extract
- 1 cup heavy whipping cream, cold
- 1/2 cup Biscoff spread, melted (for topping, optional)
- Crushed Biscoff cookies for garnish (optional)
Instructions
- Mix crushed Biscoff cookies with melted butter. Press into the bottom of a springform pan. Chill in the refrigerator while making the filling.
- In a large bowl, beat the cream cheese until smooth. Add Biscoff spread, powdered sugar, and vanilla. Mix until fully combined.
- In a separate bowl, whip the heavy cream until stiff peaks form. Gently fold the whipped cream into the Biscoff mixture.
- Pour the filling over the crust and smooth the top. Refrigerate for at least 6 hours or overnight until set.
- Once set, pour melted Biscoff spread on top and sprinkle with crushed cookies. Chill again for 15–20 minutes.
- Slice and enjoy this rich, creamy, no-bake cheesecake with irresistible cookie butter flavor!
Notes
- For best results, use cold heavy cream for whipping.
- Allow the cheesecake to set overnight for a firmer texture.
- Feel free to adjust the amount of Biscoff spread based on your taste preference.
- Prep Time: 30 minutes
- Cook Time: 0 minutes
- Category: Dessert
- Method: No-bake
- Cuisine: American
Nutrition
- Serving Size: 1 slice
- Calories: 450
- Sugar: 30g
- Sodium: 250mg
- Fat: 30g
- Saturated Fat: 15g
- Unsaturated Fat: 10g
- Trans Fat: 0g
- Carbohydrates: 40g
- Fiber: 1g
- Protein: 5g
- Cholesterol: 80mg


Leave a Comment