
Introduction to Perfect Greek Pita
When it comes to homemade bread, few things can compare to the joy of making the perfect Greek pita. This fluffy and delicious bread is not only a staple in Mediterranean cuisine but also a versatile addition to any meal. Whether you’re wrapping up grilled meats, enjoying fresh veggies, or dipping into savory sauces, Greek pita enhances every bite.
What makes this recipe so special is its simplicity, making it ideal for young professionals and homemade-food lovers who appreciate quality but are often pressed for time. With just a handful of ingredients—flour, yeast, olive oil, salt, and water—you can create pitas that are soft, warm, and perfect for any occasion. This recipe takes you through the steps of mixing, kneading, and baking, allowing you to enjoy the delightful aroma of fresh bread wafting through your kitchen.
Imagine pulling fluffy pitas from the oven, ready to be filled or served alongside your favorite dips. It’s not only a culinary achievement but also a chance to bring family and friends together around the table. So roll up your sleeves and get ready to experience the art of bread-making with this perfect Greek pita recipe! Enjoy the satisfaction of homemade goodness and the endless possibilities that come with it.
Key Ingredients
Creating the perfect Greek pita starts with understanding the key ingredients that contribute to its delightful flavor and texture. Each element plays a vital role in ensuring your pitas turn out fluffy and delicious.
All-Purpose Flour (2 cups)
All-purpose flour is the foundation of your pita dough, providing the structure needed for the bread to rise and puff during baking. It contains the right balance of protein to create a chewy yet tender texture that is essential for a great pita.
Salt (1 teaspoon)
Salt enhances the flavor of the pita and strengthens the gluten structure in the dough. This is crucial for achieving the right texture and ensures that the bread is seasoned perfectly, making each bite enjoyable.
Sugar (1 teaspoon)
Sugar feeds the yeast, promoting fermentation and helping the dough to rise. It also adds a subtle sweetness that balances the savory flavors, contributing to the overall taste of the pita.
Olive Oil (1 tablespoon)
Olive oil adds richness and moisture to the dough, resulting in a softer pita. It also enhances the flavor, imparting a slight fruity note that complements the other ingredients.
Active Dry Yeast (1 teaspoon)
Yeast is the leavening agent that makes the dough rise, creating air pockets that give the pita its characteristic puffiness. This ingredient is key to achieving that delightful pocket in the center of the bread.
Warm Water (3/4 cup)
Warm water is essential for activating the yeast and hydrating the flour. It creates an ideal environment for fermentation, which is crucial for the dough to rise effectively.
These key ingredients work harmoniously to create the perfect Greek pita. Understanding their roles helps you appreciate the simplicity and beauty of homemade bread!

Why You’ll Love This Recipe
Homemade Perfect Greek Pita is a delightful addition to any meal, and this recipe makes it easy to create fluffy, soft pitas right in your own kitchen. Young professionals and homemade-food lovers will appreciate the straightforward process that yields delicious results. With just a handful of ingredients, you can elevate your culinary skills and impress family and friends.
What truly makes this recipe irresistible is its versatility. Whether you’re using the pitas for wraps filled with grilled vegetables or meats, or serving them alongside dips like hummus or tzatziki, they enhance every dish. Plus, the satisfaction of pulling freshly baked pitas from the oven is an experience that every home cook should enjoy.
This recipe not only provides a tasty bread option but also encourages creativity in the kitchen. You can experiment with fillings, spices, and even use the pitas to create mini pizzas! The possibilities are endless, making this a staple worth adding to your repertoire. So, roll up your sleeves and get ready to enjoy the deliciousness of homemade Greek pita!
Variations
Exploring variations of the perfect Greek pita can add excitement to your homemade bread experience. Here are some creative options to consider:
Whole Wheat Pita
For a healthier option, use whole wheat flour in place of all-purpose flour. This variation increases the fiber content and adds a nutty flavor, making your pitas even more nutritious. Whole wheat pitas are perfect for hearty sandwiches or wraps.
Herb-Infused Pita
Elevate the flavor of your pitas by mixing in fresh herbs such as oregano, rosemary, or thyme into the dough. These herb-infused pitas not only look beautiful but also enhance the taste, making them ideal for serving with dips or as a side to grilled meats.
Spiced Pita
Add a twist to your pitas by incorporating spices like cumin or paprika into the dough. This variation brings a warm flavor profile that pairs wonderfully with Mediterranean dishes, offering a deliciously unique experience.
Stuffed Pita
For a fun and filling option, try stuffing the pitas with a mixture of cheese, spinach, or seasoned meat before baking. Stuffed pitas make for a satisfying snack or meal on their own and are sure to impress your guests.
These variations allow you to enjoy the perfect Greek pita in many different ways, encouraging creativity in the kitchen while satisfying any craving!

Cooking Tips and Notes
Making the perfect Greek pita is an art that benefits from a few crucial tips and notes. These insights will help you achieve that fluffy, delicious bread that everyone loves.
Use a Baking Stone
For optimal results, consider using a baking stone. Preheat it in your oven to ensure even heat distribution, which helps create a beautifully puffed pita. If you don’t have a baking stone, a preheated baking sheet will also do the trick.
Keep Dough Covered
While letting your dough rise, keep it covered with a damp cloth or plastic wrap. This prevents the surface from drying out, allowing the dough to rise properly and develop that sought-after texture. A dry surface can lead to tough pitas that won’t puff up in the oven.
Roll Evenly
When rolling out your dough, aim for an even thickness of about 1/4 inch. This ensures that the pitas cook uniformly. If they are too thick, they may not puff properly; if too thin, they can become crispy rather than soft.
Store Properly
Once baked, it’s essential to store your pitas correctly to maintain their softness. Place them in an airtight container or wrap them in a clean kitchen towel to keep them warm and fluffy. This helps prevent drying out and keeps them ready for your next meal.
These cooking tips will guide you in mastering the art of making the perfect Greek pita, ensuring delicious results every time!
Serving Suggestions
Greek pitas are incredibly versatile and can be enjoyed in numerous ways, making them a fantastic addition to any meal. Whether you’re hosting a casual get-together or enjoying a quiet night in, here are some delightful serving suggestions to elevate your experience.
Wraps and Sandwiches
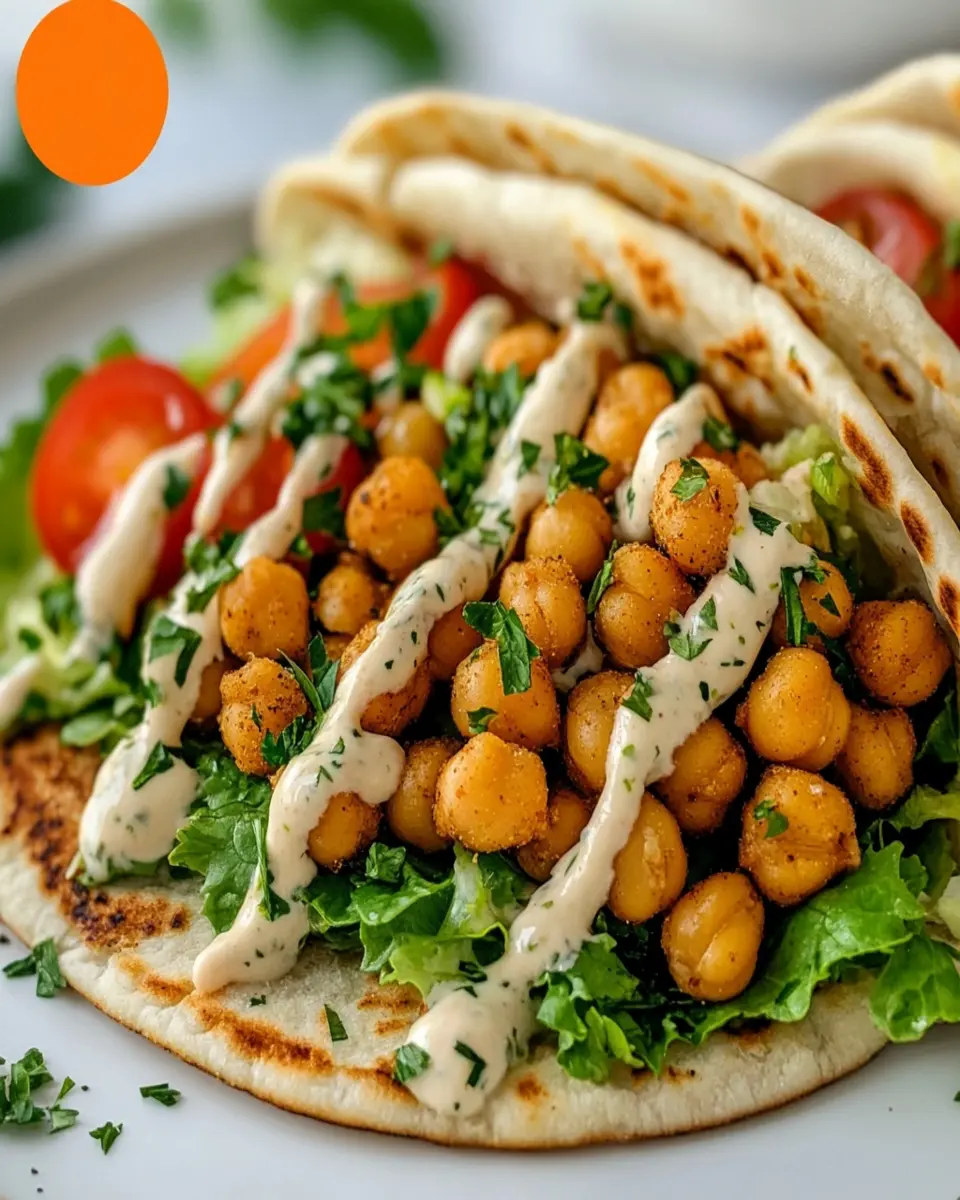
One of the simplest and most popular ways to enjoy your perfect Greek pita is by using it as a wrap. Fill it with grilled chicken, fresh vegetables, and a drizzle of tzatziki for a delicious, Mediterranean-inspired sandwich. You can also opt for falafel, hummus, and a mix of crunchy salads for a vegetarian option that’s equally satisfying.
Dipping Delight
Pitas make excellent dippers! Serve warm pitas alongside a variety of dips such as hummus, baba ganoush, or tzatziki. This creates a fun and interactive appetizer for your guests. Cut the pitas into triangles for easy dipping and enjoy the delightful combination of flavors.
Pita Pizzas
For a quick and fun meal, consider making pita pizzas! Spread a layer of marinara sauce on your pita, sprinkle with mozzarella cheese, and add your favorite toppings. Bake in the oven until the cheese is bubbly and golden. It’s a creative twist that’s sure to please both kids and adults alike.
These serving suggestions will not only enhance your enjoyment of homemade Greek pitas but also inspire creativity in your cooking. Enjoy experimenting with different fillings and pairings!

Time Breakdown
Understanding the time involved in making the Perfect Greek Pita can help you plan your cooking efficiently. Here’s a quick breakdown of the time required:
Preparation: 15 minutes
In just 15 minutes, you can mix the ingredients and get your dough ready for rising. This is a great way to maximize your time in the kitchen!
Cooking/Baking: 10 minutes
Baking the pitas takes only about 10 minutes! This quick cooking time allows you to enjoy fresh, warm pitas in no time.
Total: 1 hour 25 minutes
With a total time of about 1 hour and 25 minutes, including the rising time, you can have delicious homemade pitas ready to serve. Remember, the wait is worth it for that perfect Greek pita!
Nutritional Facts
Understanding the nutritional profile of the perfect Greek pita can help you enjoy it mindfully. Each serving contains approximately 150 calories, making it a light yet satisfying option.
Nutritional Breakdown
- Calories: 150
- Fat: 4g (including 0.5g saturated fat and 3g unsaturated fat)
- Carbohydrates: 25g, with 1g of fiber and 0g of sugar.
- Protein: 5g
- Cholesterol: 0mg
- Sodium: 150mg
These pitas are not only delicious but also a healthy choice, especially when enjoyed as part of a balanced meal. They can be paired with various fillings and dips, making them a versatile addition to your diet.
FAQ (based on “People Also Ask” section)
What is the best way to store Greek pita?
To keep your perfect Greek pita soft and fresh, store them in an airtight container or wrap them in a clean kitchen towel. This helps to maintain moisture and prevents them from drying out. You can also freeze them for longer storage, just make sure to separate them with parchment paper.
How do you reheat Greek pita?
Reheating your pitas is easy! You can warm them in a microwave for about 10 seconds, or place them in a preheated oven at 350°F (175°C) for a few minutes until they are warm. If you prefer a crispy texture, consider using a toaster oven or skillet to heat them.
Can I make Greek pita ahead of time?
Absolutely! You can prepare the dough in advance and let it rise, then shape and bake the pitas when you’re ready to serve. Alternatively, you can bake them ahead of time and store them in an airtight container; just reheat before serving.
What can I use Greek pita for?
Greek pita is incredibly versatile. Use it for wraps filled with your favorite meats, veggies, or spreads. They also work great as a base for mini pizzas, or simply serve them with dips like hummus or tzatziki. The options are endless, making them a perfect addition to any meal!
Conclusion
In conclusion, making the perfect Greek pita at home is not only rewarding but also a delightful culinary experience. With simple ingredients and straightforward instructions, you can enjoy fluffy pitas that are perfect for wraps, dips, or simply on their own. This recipe allows for creativity, whether you’re stuffing them with savory fillings or pairing them with your favorite dips. So why not take a moment to try your hand at this easy recipe? Enjoy the satisfaction of homemade bread, and don’t forget to share your delicious creations with friends and family!
Print
Perfect Greek Pita
- Total Time: 1 hour 25 minutes
- Yield: 6 pitas 1x
- Diet: Vegetarian
Description
This Perfect Greek Pita recipe will take your homemade bread to the next level!
Ingredients
- 2 cups all-purpose flour
- 1 teaspoon salt
- 1 teaspoon sugar
- 1 tablespoon olive oil
- 1 teaspoon active dry yeast
- 3/4 cup warm water
Instructions
- In a bowl, mix the flour, salt, and sugar.
- Dissolve the yeast in warm water and let it sit for 10 minutes.
- Add the yeast mixture and oil to the flour mixture.
- Knead the dough until smooth, about 10 minutes.
- Let the dough rise in a warm place until doubled in size, about 1 hour.
- Preheat the oven to 500°F (260°C) with a baking stone or baking sheet inside.
- Punch down the dough and divide it into balls.
- Roll each ball into a flat circle.
- Bake on the preheated stone or sheet until puffed and slightly browned, about 5-7 minutes.
Notes
- Store pitas in an airtight container to keep them soft.
- These pitas can be used for wraps or served with dips.
- Prep Time: 15 minutes
- Cook Time: 10 minutes
- Category: Bread
- Method: Baking
- Cuisine: Greek
Nutrition
- Serving Size: 1 pita
- Calories: 150
- Sugar: 0g
- Sodium: 200mg
- Fat: 2g
- Saturated Fat: 0g
- Unsaturated Fat: 1g
- Trans Fat: 0g
- Carbohydrates: 30g
- Fiber: 1g
- Protein: 4g
- Cholesterol: 0mg


Leave a Comment