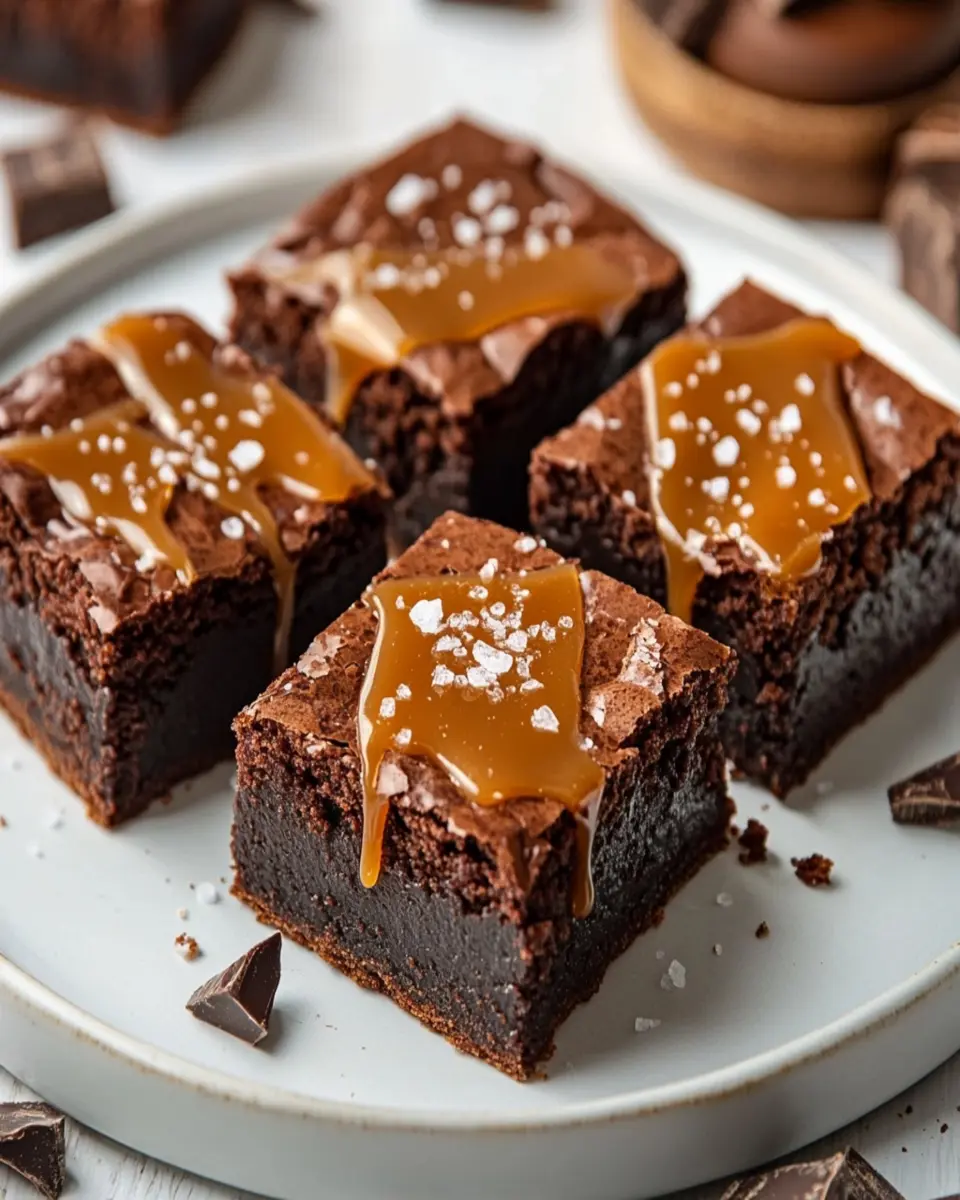
Introduction to Chocolate Fudge
Ah, chocolate fudge! Just the thought of it brings a smile to my face. If you’re like me, juggling a busy life while trying to whip up something delightful for your family, this recipe is a lifesaver. It’s quick, easy, and oh-so-satisfying! Whether you need a sweet treat for a last-minute gathering or a little indulgence after a long day, this chocolate fudge is your go-to solution. Plus, it’s a dish that never fails to impress your loved ones. So, let’s dive into this deliciously simple recipe that will have everyone asking for seconds!
Why You’ll Love This Chocolate Fudge
This chocolate fudge is a dream come true for busy women like us! It comes together in just 20 minutes, making it perfect for those hectic days when time is tight. The rich, creamy texture and decadent chocolate flavor will have your family raving. Plus, it’s versatile—great for parties, gifts, or simply satisfying that sweet tooth. Trust me, once you try it, you’ll be hooked!
Ingredients for Chocolate Fudge
Let’s gather our ingredients for this delightful chocolate fudge! Each one plays a crucial role in creating that rich, melt-in-your-mouth experience we all crave. Here’s what you’ll need:
- Semi-sweet chocolate chips: These little morsels are the star of the show! They provide that luscious chocolate flavor that makes fudge so irresistible. You can also use dark chocolate chips for a richer taste.
- Sweetened condensed milk: This creamy ingredient adds sweetness and helps bind everything together. It’s like magic in a can! If you’re looking for a lighter option, you can try using evaporated milk, but the texture will be different.
- Unsalted butter: Butter adds richness and a smooth texture to the fudge. Using unsalted allows you to control the saltiness of your treat. If you’re in a pinch, margarine can work as a substitute, but I always prefer the flavor of real butter.
- Vanilla extract: A splash of vanilla enhances the overall flavor, making the fudge taste even more decadent. If you’re feeling adventurous, try using almond extract for a unique twist!
- Chopped nuts (optional): Nuts add a delightful crunch and a bit of protein. Walnuts or pecans are great choices, but feel free to skip them if you have picky eaters at home.
- Pinch of salt: Just a tiny bit of salt balances the sweetness and elevates the chocolate flavor. It’s amazing how such a small amount can make a big difference!
For exact measurements, check the bottom of the article where you can find everything listed for easy printing. Now that we have our ingredients ready, let’s get cooking!
How to Make Chocolate Fudge
Now that we have our ingredients ready, let’s get down to the fun part—making the chocolate fudge! Follow these simple steps, and you’ll have a delicious treat in no time. Trust me, it’s easier than you think!
Step 1: Prepare Your Baking Dish
First things first, let’s get our baking dish ready. Grab an 8-inch square baking dish and line it with parchment paper. Make sure to leave some overhang on the sides. This little trick will make it super easy to lift the fudge out later. No one wants to wrestle with a sticky pan, right? Just a quick tip: if you don’t have parchment paper, you can lightly grease the dish with butter or cooking spray, but parchment is my go-to for easy removal!
Step 2: Melt the Ingredients
Next, it’s time to melt our chocolatey goodness! In a medium saucepan, combine the semi-sweet chocolate chips, sweetened condensed milk, and unsalted butter. Place the saucepan over low heat. Stir continuously until everything is smooth and melted together. This part is like a warm hug for your taste buds! Just be patient and keep stirring; we don’t want any chocolate to stick to the bottom and burn. If you’re feeling fancy, you can even use a double boiler for this step, but I find the saucepan works just fine!
Step 3: Add Flavorings
Once your mixture is all melted and looking divine, it’s time to add some flavor! Remove the saucepan from the heat and stir in the vanilla extract, chopped nuts (if you’re using them), and a pinch of salt. The vanilla will elevate the flavor, while the salt balances the sweetness. If you’re using nuts, make sure they’re chopped into small pieces so they mix in nicely. Give it a good stir until everything is well combined. Your kitchen will smell heavenly at this point!
Step 4: Pour and Spread
Now comes the fun part—pouring the fudge mixture into your prepared baking dish! Carefully pour the melted fudge into the dish, and use a spatula to spread it evenly. Make sure to get into the corners so every bite is just as delicious as the last. It’s like spreading a warm blanket of chocolate goodness! Once it’s all smoothed out, take a moment to admire your work. You’re almost there!
Step 5: Chill the Fudge
Time to let the magic happen! Pop the baking dish into the refrigerator and let the fudge chill for at least 2 hours, or until it’s firm. This is the hardest part—waiting! But trust me, it’s worth it. If you’re in a hurry, you can place it in the freezer for about 30 minutes, but keep an eye on it so it doesn’t freeze solid. Patience is key here, my friend!
Step 6: Cut and Serve
Once your fudge is set and firm, it’s time to cut it into squares. Carefully lift the fudge out of the dish using the parchment paper overhang. Place it on a cutting board and use a sharp knife to cut it into squares. I like to cut mine into bite-sized pieces, but you can make them as big or small as you like. Just remember, the smaller they are, the easier it is to sneak a few extra bites! Serve them up on a pretty plate, and watch your family’s eyes light up. Enjoy every delicious moment!

Tips for Success
- Make sure to stir continuously while melting to prevent burning.
- Use high-quality chocolate chips for the best flavor.
- Let the fudge cool slightly before refrigerating to avoid condensation.
- For a fun twist, try adding a splash of coffee or a dash of cinnamon!
- Store any leftovers in an airtight container in the fridge for up to a week.
Equipment Needed
- Medium saucepan: A regular saucepan works perfectly, but a double boiler can help prevent burning.
- Spatula: Use a silicone spatula for easy mixing and scraping.
- Baking dish: An 8-inch square dish is ideal; any similar-sized dish will do.
- Sharp knife: For cutting the fudge into squares.
- Parchment paper: If you don’t have it, greasing the dish with butter is a good alternative.
Variations of Chocolate Fudge
- Nutty Delight: Add a mix of your favorite nuts, like almonds or hazelnuts, for an extra crunch and flavor.
- Mint Chocolate Fudge: Stir in a few drops of peppermint extract for a refreshing twist that’s perfect for the holidays.
- Peanut Butter Swirl: Before chilling, drop spoonfuls of creamy peanut butter into the fudge and swirl it for a deliciously nutty flavor.
- Vegan Chocolate Fudge: Substitute the butter with coconut oil and use dairy-free chocolate chips for a vegan-friendly treat.
- Spicy Chocolate Fudge: Add a pinch of cayenne pepper or chili powder for a surprising kick that pairs beautifully with chocolate.
- Fruit-Infused Fudge: Mix in dried fruits like cranberries or cherries for a chewy texture and a burst of flavor.
Serving Suggestions for Chocolate Fudge
- Pair your chocolate fudge with a scoop of vanilla ice cream for a delightful contrast.
- Serve it alongside fresh berries for a pop of color and freshness.
- Drizzle with caramel or chocolate sauce for an extra indulgent touch.
- Present on a decorative platter, garnished with mint leaves for a beautiful display.
- Enjoy with a cup of coffee or hot cocoa for the ultimate cozy treat!
FAQs about Chocolate Fudge
Got questions about chocolate fudge? You’re not alone! Here are some common queries I’ve encountered, along with my answers to help you navigate your fudge-making journey.
1. Can I use different types of chocolate for my fudge?
Absolutely! While semi-sweet chocolate chips are the classic choice, you can experiment with dark chocolate for a richer flavor or even white chocolate for a sweeter twist. Just keep in mind that the texture may vary slightly depending on the type of chocolate you choose.
2. How should I store leftover chocolate fudge?
To keep your chocolate fudge fresh, store it in an airtight container in the refrigerator. It should last for about a week. If you want to keep it longer, you can freeze it! Just wrap it tightly in plastic wrap and then place it in a freezer-safe container. When you’re ready to enjoy, let it thaw in the fridge overnight.
3. Can I make chocolate fudge without sweetened condensed milk?
While sweetened condensed milk is a key ingredient for that creamy texture, you can try substituting it with a homemade version using milk and sugar. However, the flavor and texture may not be quite the same. If you’re looking for a dairy-free option, consider using coconut milk and adding a bit of sugar to mimic the sweetness.
4. What can I add to my chocolate fudge for extra flavor?
The possibilities are endless! You can mix in chopped nuts, dried fruits, or even a splash of flavored extracts like almond or peppermint. For a fun twist, try adding a sprinkle of sea salt on top before chilling for a sweet and salty contrast. Get creative and make it your own!
5. Why is my chocolate fudge too soft?
If your fudge turns out too soft, it may not have chilled long enough. Make sure to refrigerate it for at least 2 hours, or until it’s firm. If it’s still too soft after chilling, it could be due to using too much sweetened condensed milk or not enough chocolate. Don’t worry; it’ll still taste delicious, even if it’s a bit gooey!
Final Thoughts
Making chocolate fudge is more than just a recipe; it’s a delightful experience that brings joy to both the cook and those who get to enjoy the sweet results. The simplicity of this chocolate fudge recipe means you can whip it up even on the busiest days, creating a moment of happiness in your kitchen. Whether you’re sharing it with family, gifting it to friends, or savoring a piece all to yourself, each bite is a reminder of the little pleasures in life. So, roll up your sleeves, embrace the chocolatey goodness, and let the smiles unfold!
Print
Chocolate Fudge: Discover the Easiest Recipe Ever!
- Total Time: 2 hours 20 minutes
- Yield: 16 servings 1x
- Diet: Vegetarian
Description
Discover the easiest recipe for delicious chocolate fudge that is perfect for any occasion.
Ingredients
- 2 cups semi-sweet chocolate chips
- 1 can (14 ounces) sweetened condensed milk
- 1/4 cup unsalted butter
- 1 teaspoon vanilla extract
- 1/2 cup chopped nuts (optional)
- Pinch of salt
Instructions
- Line an 8-inch square baking dish with parchment paper, leaving some overhang for easy removal.
- In a medium saucepan over low heat, combine the chocolate chips, sweetened condensed milk, and butter. Stir continuously until the mixture is smooth and fully melted.
- Remove the saucepan from heat and stir in the vanilla extract, chopped nuts (if using), and a pinch of salt until well combined.
- Pour the fudge mixture into the prepared baking dish and spread it evenly.
- Refrigerate for at least 2 hours, or until the fudge is firm.
- Once set, lift the fudge out of the dish using the parchment paper overhang and cut it into squares.
Notes
- For a richer flavor, try using dark chocolate chips instead of semi-sweet.
- You can also add a sprinkle of sea salt on top before chilling for a sweet and salty contrast.
- Prep Time: 10 minutes
- Cook Time: 10 minutes
- Category: Dessert
- Method: Stovetop
- Cuisine: American
Nutrition
- Serving Size: 1 square
- Calories: 150
- Sugar: 14g
- Sodium: 50mg
- Fat: 8g
- Saturated Fat: 5g
- Unsaturated Fat: 3g
- Trans Fat: 0g
- Carbohydrates: 18g
- Fiber: 1g
- Protein: 2g
- Cholesterol: 10mg


Leave a Comment